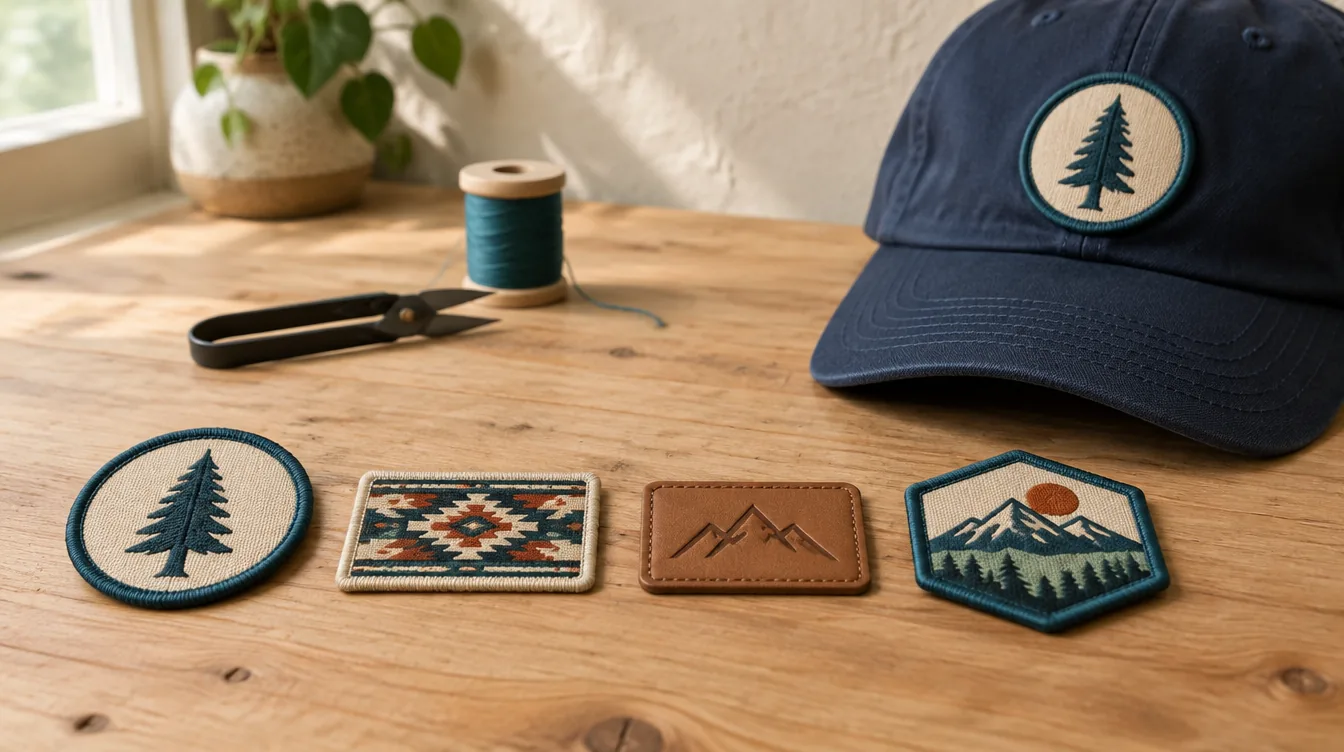
A custom patch hat starts with two things that need to work together: the patch and the cap. The logo has to stay readable at a small size, the material has to suit the look you want, and the finished patch has to sit comfortably on a curved front panel.
If you have been searching for how to make custom patches for hats, the process is easier to understand as a sequence of decisions. Choose the cap, adapt the artwork, select the patch construction, approve the details, and confirm how the patch will be attached. Each step affects the finished result.
You do not need to arrive with a production-ready patch file. You do need a clear idea of who will wear the hats, how many you need, and which parts of your logo must remain recognizable.
Start With the Cap and Patch Together
It is tempting to design the patch first and choose a hat later. That can create problems when a wide badge meets a narrow front panel or a tall shape sits too close to the brim.
Compare the proposed patch dimensions with the actual cap style. A structured front, a relaxed crown, and a mesh-backed trucker do not provide the same surface or silhouette. Look at seams, panel height, curvature, and the available decoration area.
DDESIGNS offers custom headwear with embroidered, woven, and leatherette patch options, and stitches logos directly on caps through our Springfield embroidery service. Start with the style you want to wear, then ask which patch shapes and dimensions work well on that specific blank.
A cap color can also change the patch’s appearance. A dark border may disappear against a dark crown, while a contrasting border can make the same design feel more prominent. Review the whole combination instead of judging the patch in isolation.
Prepare a Logo That Works at Patch Size
Send the clearest artwork you have, preferably the original design file when it is available. A screenshot can communicate the idea, but the artwork may need rebuilding before production.
Then decide what matters most. A company name, recognizable symbol, or simple badge shape may carry the identity more effectively than a complete logo lockup with a tagline, phone number, and tiny decorative details.
Ask to see the design at its proposed physical size. Zooming in makes almost anything look readable. A proof viewed near actual size reveals whether someone can understand the mark at a glance.
Common adjustments include opening narrow spaces, enlarging small lettering, reducing detail, and changing the proportions of a border. These are production decisions, so approve any changes that affect your brand. If your organization has logo rules, provide them at the start.
Choose the Patch Construction
Embroidered Patches
An embroidered patch uses stitched thread to build the design on a backing material. It can give bold lettering and simple shapes a textured appearance. The visible fabric, thread coverage, border, and stitch direction all contribute to the finished look.
Tiny lettering and tightly packed details deserve a close review because thread takes up physical space. Ask whether simplifying the art or enlarging the patch would improve readability.
Our embroidery buyer’s guide explains digitizing and the relationship between artwork and stitching. For a patch order, that same distinction matters: a logo image communicates the design, while production preparation determines how it will be made.
Woven Patches
Woven patches create the image as part of a woven construction. They can be worth discussing when a design contains finer lettering or detail that is difficult to resolve with an embroidered treatment.
That does not mean every small logo detail will reproduce clearly. The size, color contrast, and specific construction still matter. Ask the producer to assess the actual artwork and show what needs to change.
Leatherette Patches
Leatherette is a manufactured material used to create a leather-like appearance. It can suit simple badges and logos where material color and contrast do much of the visual work.
Do not assume every leatherette product is engraved, printed, or finished the same way. Ask which marking process is proposed for the selected material, what colors or contrast are available, and how the edges will look. Confirm the material description if you want to describe the finished hats in your own store or marketing.
Set the Shape, Border, and Dimensions
A rectangle gives a long company name room to breathe. A circle can suit a compact symbol. A custom outline can follow the design, but complicated shapes need careful attention to edge finishing and attachment.
Choose a shape because it helps the logo and fits the cap. Adding an elaborate outline does not automatically make the patch more distinctive or easier to read.
Confirm the width and height in actual units, along with the border style and color. Ask how much usable space remains inside the border. A patch’s outside dimensions and its practical design area are not necessarily the same.
If you are comparing options, change one variable at a time. Seeing the same logo in two patch materials on the same cap is easier to evaluate than comparing different hats, colors, sizes, and materials all at once.
Review What the Proof Can Tell You
A useful approval review covers spelling, logo version, orientation, material, colors, dimensions, border, cap style, and placement. Check the quantity and any variation between versions as well.
A digital proof is a visual plan. It can show the intended design and location, but it cannot fully represent texture, stiffness, or how a finished patch conforms to the cap. Ask whether a physical sample or production sample is appropriate and available for your project. Confirm any related costs and timing.
For a recurring company hat, saving the approved details matters. Keep the product identifiers and artwork version together so the next order does not accidentally use a different cap profile or an older logo.
Confirm How the Patch Will Be Attached
Attachment is part of the production plan. Depending on the patch, backing, cap, and equipment, a patch may be sewn, applied with a compatible heat-activated backing, or finished using another specified method.
Do not treat a generic temperature and time found online as instructions for your particular cap. Application requirements depend on the materials and the backing, as the product-specific guidance in STAHLS’ patch application overview illustrates. A curved hat surface also changes how the patch is supported during attachment.
If you want loose patches for your own project, say that clearly when requesting a quote. Ask for the backing specification and the supplier’s application guidance. If you want finished hats, have the shop confirm the complete cap-and-patch combination and attachment method.
Also clarify whether visible stitching around the patch is part of the intended appearance. It should be a deliberate choice in the approved design, not a surprise when the hats arrive.
Inspect the Finished Hat as a Whole
When reviewing a finished sample or receiving the order, look at alignment, consistent placement, clean edges, and legibility. Check whether the patch lies as intended against the front panel and whether the result matches the approved design.
Ask for care instructions that suit both the hat and its decoration. Avoid assuming the blank cap’s care label alone covers every added patch material or attachment method.
The goal is a hat that looks considered from the brim to the badge. Contact DDESIGNS with your logo, preferred cap style, quantity, and needed-in-hand date. Our Springfield team can help you work through the patch options and approve the details before your design becomes a finished cap.